Showing posts with label Scarf. Show all posts

Tuesday, January 27, 2015

Cowl

I finished a cowl in 1 day!
I'm going to wear it tonight to a local meeting. :)


"Moroccan Midnight Cowl" - Free Pattern at moogly
Yarn I used: Red Heart Soft, Red Heart Boutique Unforgettable


~ Click the button to See many variations on Ravelry! ~

This cowl is really quick to make once you get a hang of it. - Don't forget to stitch over BOTH yarn on Rnd 4. :)

Tuesday, November 04, 2014

Skinny Crochet Icicle Scarf - FREE PATTERN

It's been way too long since I last wrote my own pattern..., but another one is finally here! :)

This beautiful DK weight yarn was screaming exactly what it wanted to be....  a gorgeous scarf that's perfect for the winter holiday.  The yarn is Red Heart Boutique Swanky.  This yarn creates soft,  drapey, and slinky fabric that feels so good around the neck.  It has the oval shape sequins that allow surprisingly smooth crochet which I enjoyed so much.

This scarf definitely will not be hiding in my closet this winter!


*Click images to enlarge*


Yarn I used:  Red Heart Boutique Swanky

Visit Red Heart Amazon site to find more beatiful yarn!: http://www.redheart.com/yarn


Here is the pattern!  Hope you like it. :)

********************************************
Skinny Crochet Icicle Scarf
~ This pattern is for personal, non-commercial use only ~

The scarf is consisted mainly of slanted rows of double crochet stitches instead of the basic horizontal rows.  You can use any drapey yarn and a hook suggested on its yarn label.  The width and the length can be easily adjusted by adding/reducing numbers of stitches and rows.  I also edged the scarf to hide not-so-attractive sides of double crochet rows!  If you use the featured yarn, you will only need 1 ball!


Dimentions:
  • Approximately 3 3/4"W X 60"L


Materials:
  • US H8 / 5mm hook or other size suggested on the label of the yarn you are using
  • (1) Red Heart Boutique Swanky in Sterling (202 yd, 3.5 oz, 62% acrylic 38% polyester) or any other drapey yarn
  • Tapestry needle


Notes:
  • YO - Yarn Over
  • dc2tog - [YO, insert hook in next st, pull up a lp, YO, pull lp through 2 lps on hook] twice, YO, pull lp through remaining 3 lps on hook
  • RS - Right Side
  • WS - Wrong Side


SCARF BODY:

Ch 4.
Row 1: Dc in the 4th ch from hook, 2 dc in the same ch. Turn. - 3 sts
Row 2: Ch 3 (count as first dc), dc in the same st, dc in next st, 2 dc in top of 3-ch.  Turn. - 5 sts
Row 3: Ch 3 (count as first dc), dc in the same st, dc in each of next 3 sts, 2 dc in top of 3-ch. Turn - 7 sts
Row 4 - 8: Work these rows in the same manner increasing 1 dc in the first and last sts of each row until there are 17 sts. - You can make this scarf wider/narrower by adding/reducing rows, but make sure you have odd number of stitches! Once you decide the width of your scarf, make sure you have the same # of stitches on all the rest of the rows. (Don't skip the top of 3-ch/first dc!)
Row 9: Ch 3 (count as first dc), dc in same st, dc in each st until 2 sts remain, dc2tog in next 2 sts. Turn. - 17 sts
Row 10: Ch 2, YO, insert hook in next st, YO, pull up a lp, YO, pull lp through 2 lps on hook, YO, pull lp through remaining 2 lps on hook, dc in each of next 14 sts, 2 dc in last st. Turn. - 17 sts

Repeat Row 9 - 10 until you have 85 rows. Do not turn.  Mark the facing side of the scarf with a clip marker as RS (Right Side). - You can make your scarf longer/shorter by doing more/less rows.


SCARF BODY EDGING:
Let's edge around the Scarf Body, starting with the long side of the scarf right next to the last stitch.  Do not chain tightly.

1st Long Side:  Ch 2, sc in the SIDE of the same row (= wrap the last dc from the side with sc), *ch 2, sc in next row, rep from * until you worked the last row. Ch 2.

1st Short Side:  Sc in top of the corner st, ch 2, sc in the side of the same row. Repeat [ch 2, sc in next row] until last row is worked, ch 2, sc in top of the other corner edge.

2nd Long Side:  Repeat 1st Long Side.

2nd Short Side:  Sc in top of the corner st, repeat [ch 2, sk next st, sc in next st] to the last st. Turn. - (8) 2-ch spaces


LACE EDGING:
Start with the 2nd Short Side.

Row 1 (WS): Ch 1, sc in same st, ch 3, sc in next 2-ch sp, repeat [ch 5, sc in next 2-ch sp] to the last 2-ch sp, ch 3, sc in top of the last st. Turn. - If you had 17 sts as mine on the Scarf Body rows, you should have 9 ch-sps.
Row 2 (RS): Sl st in 3-ch space, ch 1, repeat [ch 5, sl st in 3rd ch from hook (picot made), ch 2, sc in next ch sp] until the last 3-ch sp is worked.  Fasten off.


Repeat Row 1 & 2 on the 1st Short Side (opposite short side of the scarf) by joining yarn in the first stitch on WS (Wrong Side) of the scarf.


You are done crocheting this scarf, and there is just one more thing to do - Blocking. :)  Please don't skip it because good blocking relaxes the stitches and really brings out the beauty of the scarf!

*******************************************


If you have any questions on this pattern, please comment on this post / Facebook / Ravelry. :)


Your support will help me keep offering free patterns.
Thank you and happy stitching!

Saturday, October 25, 2014

"Multidirectional Diagonal Scarf" No.2 !!!


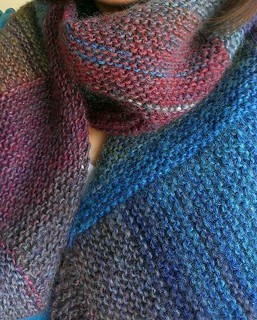
I just finished my 2nd Multidirectional Diagonal Scarf! :)

"Multidirectional Diagonal Scarf"

"Multidirectional Diagonal Scarf" by Karen Baumer
This is a FREE download on Ravelry!

This time, I again used Lion Brand Amazing but in 2100 Wild Flowers. And guess what... I'm working on the 3rd in one color - gray.  It's going to be hubby's!  He can use it for motorcycling when it gets cold, and I'm hoping it will remind him to ride carefully. :)

Wednesday, October 08, 2014

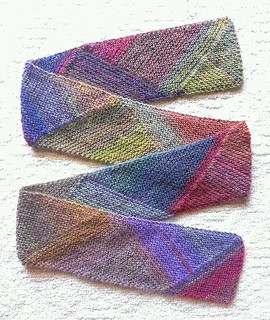
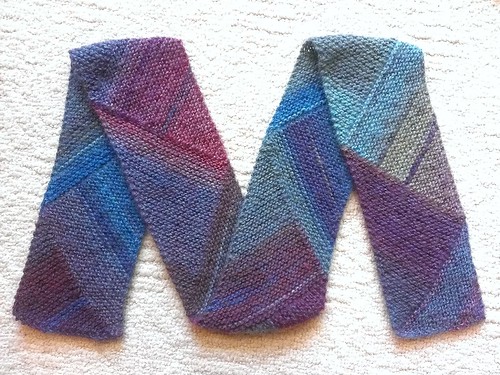
"Multidirectional Diagonal Scarf"

Fall seems to have finally arrived here, and of course, my urge for playing with yarn hit. :D
I finished this scarf!

*Click to enlarge*
Multidirectional Diagonal Scarf

  "Multidirectional Diagonal Scarf"

"Multidirectional Diagonal Scarf" by Karen Baumer
This is a FREE download on Ravelry!


My yarn of choice was Lion Brand Amazing in 2011 Glacier Bay.   Glacier Bay... I'm sure every time I wrap this scarf around my neck, I'll be daydreaming about Alaska, the land I've never stepped into.   I even like just saying "Glacier Bay" for some reason. :D


The multi-directional rows of this scarf really accentuate the color shifts in this yarn.  This pattern requires only knit stitches (no purling y'all!), and basic increasing & decreasing.  Also, no counting is necessary for the most part of it (who wouldn't love that!).

My scarf has 32 stitches for 5" width with #9 needles.  I used almost all 2 skeins, and it was enough to have a good length.  I've already been working on my 2nd in a different colorway! :)

Friday, February 21, 2014

Cowl for a Friend

I knitted a cowl for a good friend back in October...  (I know, I know... it's now February of the new year, and my last post here was a year ago!  XD)

"Silkie" Cowl
Pattern:  "Silkie" by Gudrun Johnston - Purchased at Ravelry

Yarn: Quince and Co. Osprey in Delft 108

I started with provisional/chain cast-on to finish this snood with 3-needle bind-off. - If you don't know what I'm talking about here and really want to learn knitting, visit KnittingHelp.com :)
I'm a huge fan of the I-cord edge of this cowl (smooth, beautiful side edges!), and not having to use a cable needle to create this stitch pattern was a plus!  It was quick and the stitch pattern was not boring or too complex. :)

Oh, and I have another scarf in progress, and I won't be long before I post it here, I promise! :D

Monday, December 13, 2004

Holiday Projects

Hiya. :D I bet you all were thinking, "Where in the world did Chie go???". LOL
Well, I am through making Christmas gifts, mailed out the ones that had to be mailed, and I only have some wrapping left. (^_^) We put up our Christmas tree, put outside lights and house decorations too.

Here are some of the things I made.


The beret pattern is from Coat's & Clark's booklet called "Accessorize!", which I got from my local WM. It has crochet and knitting patterns ONLY for Red Heart's Light & Lofty yarn. I used P hook instead of suggested N hook. It's probably just me, but I can't use this yarn with smaller hooks than P. (^^; The mini scarf is made with repeating HDC row and DC row.

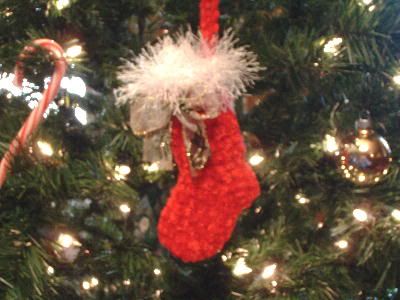
I used Toe-Up Crochet Socks pattern to make the mini stocking ornament. The yarn is Lion Brand's Chenille Think & Quick in Scarlet 113 and white Fun Fur. I'd like to thank wonderful Sharon to make this ornament possible. *bows*

*****

Now it's time for me to plan Christmas meal! It's always a bit frustrating because I am not so familiar with traditional American holiday dishes. You see, sushi or tempura for Christmas is just so... improper (or not?)! LOL This year, I am planning on making lots of sweets, and I am definitely making this, this, and this! Yummy, yummy... (=^_^=) Cara is a talented knitter & crocheter who uses both yarn and thread!

*****

I am very excited about upcoming Crochetville thread crochet CAL(temporary link) which is going to start around Jan. 7th 2005! In fact, I'm too excited I couldn't help but to start making a doily with this pattern from Celt's Vintage Crochet, and it is almost finished. To be honest, I cannot recommend this pattern to beginner crocheters just because there are some errors on the pattern, and the doily on the picture cannot be accomplished just by following the pattern. (-_-;) There is an error on the 1st row so it's confusing at the very beginning. But with some experience of making doilies, the error shouldn't be hard to correct. Celt's Vintage Crochet has tons of BEAUTIFUL thread crochet patterns, and I love it!
Hopefully next time, I will be able to post a picture of my finished doily. (^_-)*

Monday, November 01, 2004

Things I made for Kelly

Kelly was my gift recipent for Crochetville Autumn Secret Pal swap. (^_^) I studied her color preference etc. very, very carefully and made the following.

My very first hand-made item for her was a linen doily. I combined two Japanese patterns I had and came up with this.


And the next was a cellphone cozy. This is my own design. Hehe.


I made a hook case for Kelly as well. Its pattern is here. One of the pictures on the pattern page shows that this hook case can hold up to 28 crochet hooks and many more tools. How clever! I had to make one for myself, too. (^_^)


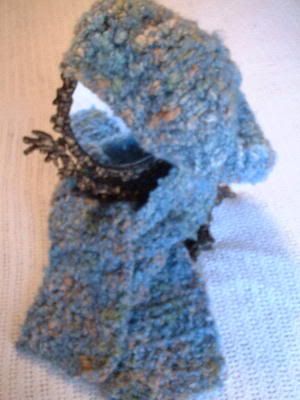
Finally, a scarf. The yarn is Red Heart's Light & Lofty, and the color is 9617 Pheasant. I DC-ed away the scarf because I thought this way, it would become thick and bouncy soft.


I so enjoyed every steps to make all those things... Learning what Kelly likes, checking her blog to find a clue what she might need, deciding what to make, picking yarn of her favorite colors, crocheting daydreaming her reaction when she receives the item.....
Making things for somebody is just so much fun and addictive. (=^_^=) That's why no matter how many items I make, I have few left with myself. And I know I'm not the only one, I can tell from reading all the blogs of my super nice fellow crocheters & knitters. LOL How awesome!